In This Article
✨Was this helpful? Spread the word! 🚀
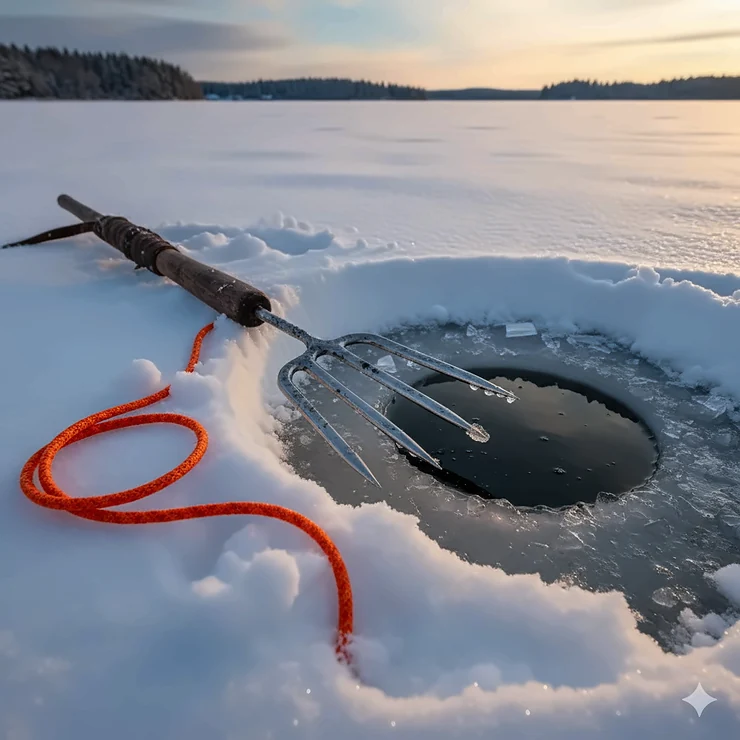
Picture this: you’re sitting in complete darkness, staring through a massive hole in the ice like it’s nature’s own aquarium. The water below glows with an ethereal light, and suddenly—bam!—a 40-inch northern pike glides into view. Your heart races as you grip your ice fishing spear, waiting for the perfect moment to strike. This isn’t just fishing; it’s an ancient art form that’s experiencing a massive renaissance.
I’ve been darkhouse spearing for over a decade now, and I can tell you there’s nothing quite like the adrenaline rush of launching a spear at a trophy fish. The tradition dates back over 2,000 years to indigenous tribes of North America, and today’s modern anglers are rediscovering why this method has stood the test of time. Unlike conventional ice fishing where you’re blindly waiting for a bite, spear fishing through ice lets you see everything—it’s like hunting rather than fishing, and that’s exactly what makes it so addictive.
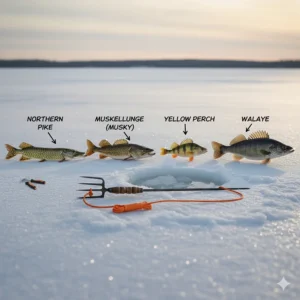
Whether you’re targeting northern pike, muskie, carp, or sturgeon (depending on your state regulations), having the right ice fishing spear can make the difference between landing a trophy and watching it swim away. In this comprehensive guide, I’ll walk you through the top seven spears available in 2025, essential buying considerations, proven techniques, and everything else you need to become a successful darkhouse spearing enthusiast.
Quick Comparison Table
| Spear Model | Tines | Weight | Length | Price | Best For |
|---|---|---|---|---|---|
| AA Manufacturing CNC Plasma Cut | 7 | 4-5 lbs | 60″ total | $45-65 | Budget-conscious beginners |
| 406 Custom 7-Tine | 7 | 5-6 lbs | 58″ | $200-250 | Customization enthusiasts |
| Grapentin Weighted Barbed | 7 | 8-10 lbs | 62″ | $129-149 | Deep water pike |
| Eagle Claw 5-Tine AFISH5 | 5 | 2-3 lbs | Varies | $10-15 | Entry-level practice |
| B’n’M Stainless Steel | 5-9 | 3-4 lbs | Varies | $18-33 | Versatile all-around |
| Pike Slayer 7-Tine | 7 | 4-5 lbs | 58″ | $79.99 | Balanced performance |
| Danielson 5-Tine Quick Release | 5 | 3-4 lbs | Varies | $21.99 | Compact portability |
💬 Just one click – help others make better buying decisions too!😊
Top 7 Ice Fishing Spear Options: Expert Analysis
1. AA Manufacturing CNC Plasma Cut Ice Fishing Spear
When I first picked up the AA Manufacturing CNC Plasma Cut model, I was impressed by its rugged construction and thoughtful design. This spear represents excellent value for money, especially for those just getting started with darkhouse spearing.
Key Specifications:
- Spearhead dimensions: 9.25″ x 10.25″ x 3/16″ thick
- Total length: 60″ (48″ shaft + 12″ ash wooden handle)
- Material: Carbon steel with powder coating
- Weight: Approximately 4-5 pounds
This spear features a CNC plasma-cut head made from carbon steel, which means it’s precisely manufactured for consistent performance. The 12-inch unfinished ash handle is actually a clever touch—many users appreciate being able to customize it with wood burning, staining, or carving their names into it. One customer mentioned, “the handle is unfinished. I like this because I wood burned my name into it and put a bit of stain on to customize.”
Pros:
✅ Excellent weight distribution for accurate throws
✅ Well-balanced design that flies straight
✅ Barbs effectively prevent pike from slipping off
✅ Affordable price point for beginners
Cons:
❌ Handle may feel slightly loose and turn (solvable with minor adjustments)
❌ Tips may need sharpening out of the box for optimal penetration
Price Range: $45-$65
Customers consistently praise this spear’s performance, particularly noting that it handles large carp and pike effectively. The powder coating helps prevent rust, making it durable for years of use. At this price point, it’s hard to find better value.
2. 406 Custom 7-Tine Ice Fishing Spear
The 406 Custom 7-Tine spear is where craftsmanship meets personalization. This American-made spear has earned a cult following among serious spearing enthusiasts, and after using one myself, I understand why.
Key Specifications:
- Seven precision-cut tines
- Total length: 58″
- Weight: 5-6 pounds
- Custom color combinations: 40+ options
- Made in USA with 100% satisfaction guarantee
What sets 406 spears apart is their customization options. You can choose from over 40 color combinations for the spearhead and rope wrap, creating a truly unique tool. They’ve sold over 16,000 spears and maintain a stellar reputation with 125+ five-star Google reviews.
Pros:
✅ Fully customizable design (colors, paracord wraps)
✅ Hand-built quality with exceptional craftsmanship
✅ Free shipping on all spears
✅ Give-away program (1 free spear per 50 sold)
✅ 90-day satisfaction guarantee
Cons:
❌ Higher price point than mass-produced options
❌ May require wait time for custom builds
Price Range: $200-$250
The company offers wholesale pricing for resellers (30-40% discount) and frequently runs promotions. Their spears come with metal head covers for safety and protection. If you’re serious about darkhouse spearing and want a spear that’s uniquely yours, the 406 is worth every penny.
3. Grapentin Weighted Barbed Ice Fishing Spear
For those targeting trophy pike in deeper waters, the Grapentin Weighted Barbed spear is an absolute beast. This is the spear I reach for when I’m fishing in 15+ feet of water.
Key Specifications:
- Seven round tines with razor-sharp barbs
- Total length: 62″ (longest shaft in our lineup)
- Weight: 8-10 pounds (weighted design)
- Spearhead width: 8″
- Heat-treated steel construction
The added weight isn’t just for show—it’s strategically distributed to help the spear penetrate deeper into the water column and maintain accuracy on longer throws. The all heat-treated steel construction ensures durability that’ll last generations. The tines are arranged in an inverted triangle pattern, with the shortest ones (8″) in the center and longest (9.5″) on the edges.
Pros:
✅ Exceptional penetration power for large fish
✅ Perfect for deep water spearing (15+ feet)
✅ Heat-treated construction for maximum durability
✅ Includes 12-foot nylon rope and oak spearhead guard
✅ Made in USA
Cons:
❌ Heavier weight requires more strength and practice
❌ Premium pricing reflects superior quality
Price Range: $129-$149
This spear comes with everything you need: a 12-foot nylon retrieval rope and an oak spearhead guard to protect those razor-sharp barbs. If you’re targeting muskie, large carp, or trophy pike, the extra investment pays off in landing success.
4. Eagle Claw AFISH5 5-Tine Fish Spear
Don’t let the budget price fool you—the Eagle Claw AFISH5 is a solid performer that punches way above its weight class. This is the spear I recommend to every beginner.
Key Specifications:
- Five barbed tines
- Material: Tempered steel with black coating
- Skill level: Beginner to expert
- Fish species: Bass, catfish, walleye, pike (freshwater/saltwater)
- Mounting screw included
Eagle Claw is the only fish hook manufacturer still operating in the USA, and they’ve brought that same quality standards to their spear line. The five-tine design offers a good balance between coverage and precision. Customers report it works well for flounder, sheepshead, and pike when properly mounted on a handle.
Pros:
✅ Incredibly affordable entry point
✅ Made by trusted American manufacturer
✅ Versatile for multiple species
✅ Easy to mount on any wooden handle or PVC pipe
Cons:
❌ May bend under extreme pressure with very large fish
❌ Barbs may need sharpening for optimal performance
Price Range: $10-$15
This spear head works great for practice and learning proper technique without breaking the bank. Several users have even repurposed it for other uses (snake control, mole hunting), showcasing its versatility. For the price of a couple lattes, you can get started in darkhouse spearing—that’s pretty incredible value.
5. B’n’M Stainless Steel Frog & Fish Spear
The B’n’M Stainless Steel spear represents the premium end of versatile spearing options. These hand-forged spears are true “lifetime investments,” as the company proudly advertises.
Key Specifications:
- Available in 5, 7, or 9-tine configurations
- Material: Hand-forged stainless steel
- Needle-sharp points and barbs
- Mounting screw included
- Handle sold separately
B’n’M has been manufacturing quality fishing products for over 70 years, and their craftsmanship shows in every spear. The stainless steel construction means you’ll never worry about rust, even after years of use in harsh winter conditions. Each spear is hand-forged to B’n’M’s exacting specifications.
Pros:
✅ Hand-forged quality construction
✅ Rust-proof stainless steel never corrodes
✅ Multiple tine options for different applications
✅ Needle-sharp from the factory
✅ 70+ year company reputation
Cons:
❌ Handle must be purchased separately
❌ Slightly higher maintenance cost than coated steel
Price Range: $18-$33 (depending on tine count)
Customer reviews consistently mention the exceptional quality, with one noting “good quality gig. Should come in handy for bullfrog season.” The blister packaging makes these spears gift-ready, perfect for introducing someone to the sport.
6. Pike Slayer 7-Tine Ice Fishing Spear
The Pike Slayer 7-Tine strikes the perfect balance between performance and portability. This USA-made spear has become my go-to for most darkhouse spearing situations.
Key Specifications:
- Seven tines with double and triple barb design
- Total length: 58″
- Weight: Approximately 5 pounds
- Includes metal head cover
- Drilled handle for rope attachment
The Pike Slayer features an innovative barb design where the three center tines have triple barbs for maximum holding power. This means even aggressive pike struggle to throw the hook once speared. The perfectly balanced design makes it ideal for anglers of all skill levels.
Pros:
✅ Perfect balance for accurate throwing
✅ Triple-barb center tines prevent fish loss
✅ Metal head cover included for safety
✅ Made in USA
✅ Pre-drilled for rope attachment
Cons:
❌ Mid-range price may be steep for casual users
❌ Fixed shipping cost of $15
Price Range: $79.99 + $15 shipping
This spear represents the sweet spot for most darkhouse spearing enthusiasts—professional-grade performance without the custom spear premium. The double and triple barb design has saved me from losing fish more times than I can count.

7. Danielson 5-Tine Quick Release Jumbo Fish Spear
The Danielson 5-Tine Quick Release brings a unique feature to the table—portability. If you’re hiking to remote darkhouse spots or traveling with limited space, this is your spear.
Key Specifications:
- Five barbed tines
- Quick-release jumbo design
- Compact for easy transport
- Tempered steel construction
- Works with standard handles
The quick-release feature allows you to detach the spearhead from the handle, making this an excellent choice for anglers who need to pack light. Despite its compact nature, it doesn’t sacrifice performance when properly assembled.
Pros:
✅ Portable quick-release design
✅ Easy transport in 5-gallon bucket
✅ Jumbo size effective for larger fish
✅ Simple assembly/disassembly
Cons:
❌ Requires proper assembly before each use
❌ Connection point could be more robust
Price Range: $21.99
This spear has found a dedicated following among anglers who fish multiple locations in a single day or those who prefer minimalist gear setups. The tempered steel holds up well, and the price point makes it accessible for most budgets.
🎯 Ready to Upgrade Your Ice Fishing Game?
These carefully selected ice fishing spear options represent the best available in 2025. Click on any highlighted product to check current pricing and availability on Amazon. Whether you’re a beginner or seasoned pro, the right spear makes all the difference in your darkhouse spearing success! ⚡🎣
Understanding Ice Fishing Spear Construction and Design
The Anatomy of a Quality Spear
Let me break down what makes a quality ice fishing spear tick. After years of using different models, I’ve learned that certain design elements separate the mediocre from the magnificent.
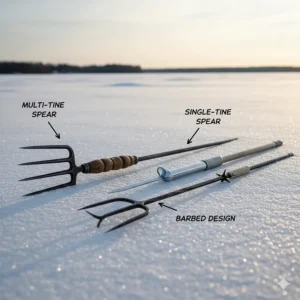
Tine Configuration 🔱
Most spears feature between 5 and 9 tines (also called prongs or points), but the sweet spot is typically 7 tines. Here’s why: fewer tines mean you need pinpoint accuracy, while too many tines add unnecessary weight and drag. The 7-tine configuration offers optimal coverage—about 8-10 inches wide—giving you a reasonable margin for error while maintaining accuracy.
The arrangement matters too. Traditional spears use an inverted triangle pattern where the shortest tines sit in the center (around 8 inches) and longer ones on the edges (up to 9.5 inches). This design works exceptionally well for pike and muskie because it accounts for their body shape and ensures solid penetration regardless of where you hit them.
Barb Design and Effectiveness 🪝
Barbs are the unsung heroes of spear design—they’re what actually keep your fish on the spear after the initial strike. I’ve seen three main types:
Forged barbs are shaped directly into the metal during manufacturing using traditional blacksmith techniques. These are the most durable and reliable, lasting decades without breaking off. Companies like B’n’M and custom makers still use this centuries-old method.
Welded barbs are separately crafted pieces welded onto the tines. They’re strong but can occasionally fail under extreme stress. Most mid-range commercial spears use this technique.
Cut barbs are notched directly from the tine using grinders. They’re the least durable option and can break off when hitting rocks or large fish. Budget spears often feature cut barbs.
Bigger barbs universally perform better—they provide more holding surface and resist bending under stress. Double and triple barb designs on center tines offer the ultimate security against fish escape.
Weight and Balance Considerations ⚖️
Weight directly correlates to penetration power and effective fishing depth. Most spears range from 4-10 pounds, with 5-8 pounds being ideal for general use. Here’s what different weights accomplish:
Light spears (4-6 pounds) work great in shallow water under 10 feet. They’re easier to control and less fatiguing during long sessions. Perfect for smaller pike and panfish.
Medium spears (6-8 pounds) represent the versatile middle ground. They handle most situations competently, from shallow weed beds to moderate depths of 15 feet.
Heavy spears (8-10+ pounds) excel in deep water fishing and when targeting trophy-sized fish. The added mass helps the spear descend quickly and penetrate thick-scaled fish like carp. However, they require more strength and practice to throw accurately.
Weight-forward designs concentrate mass near the spearhead. This configuration helps the spear track straight through water and resist deflection, similar to how arrows fly straighter with proper weight distribution.
Shaft Length and Materials 📏
Standard shaft lengths run 5-6 feet, with 58-62 inches being most common. Longer shafts provide several advantages: they fly more accurately through water, give you extended reach for deeper fish, and improve overall trajectory consistency. However, they’re also harder to maneuver in tight darkhouses.
Material choices typically include:
All-steel construction offers maximum durability and consistent weight distribution. These spears can take serious abuse without warping or breaking. Most commercial and custom spears use this approach.
Steel shaft with wooden handle provides a more traditional feel and reduces overall weight. Wood also offers superior grip comfort during cold weather. The downside? Wooden sections can rot over time if not properly maintained.
Two-piece breakaway designs feature detachable spearheads that remain connected via rope. When the fish runs, the head separates from the shaft, preventing the fish from twisting free. This style also fits perfectly in 5-gallon buckets for easier transport.
Tine Patterns and Fish Targeting
Different tine configurations excel at different tasks. The standard 7-tine pattern works for most gamefish, but specialized designs exist for specific situations.
Wide patterns (10-12 inches across) provide maximum coverage but sacrifice accuracy. They’re ideal for beginners still developing their aim.
Narrow patterns (6-8 inches) demand precision but reduce water resistance, allowing faster throws and better deep-water performance. Advanced spearers often prefer these for trophy hunting.
Perch-specific spears feature tighter tine spacing (often 9-11 tines) designed for smaller fish in shallower water.
Understanding these construction elements helps you choose the right tool for your specific spearing situation. A well-designed ice fishing spear becomes an extension of your arm, flying true and holding firm when it matters most.
How to Choose the Best Ice Fishing Spear for Your Needs
Matching Spear Weight to Water Depth
One of the biggest mistakes I see beginners make is buying a light spear for deep water fishing—or worse, a heavy spear for shallow water work. Here’s how to match your gear to conditions:
Shallow Water (0-10 feet): Lighter spears in the 4-6 pound range work perfectly here. You don’t need massive penetration power, and the reduced weight means less fatigue during long sessions. Your throw distance is minimal, so accuracy matters more than raw power. I recommend starting in shallow water to develop proper technique before graduating to deeper spots.
Medium Depth (10-15 feet): This is where 6-8 pound spears shine. You need enough mass to maintain velocity as the spear travels through water, but not so much that you’re exhausted after a few throws. Most recreational darkhouse spearing happens in this range, making medium-weight spears the most versatile choice.
Deep Water (15+ feet): Heavy spears (8-10+ pounds) become necessary here. Physics works against light spears at depth—they slow down too much and may not penetrate effectively. The weighted Grapentin spear I mentioned earlier excels in these conditions. However, deep water spearing demands excellent physical conditioning and refined technique.
Tine Count and Configuration Selection
The eternal question: how many tines do you really need? The answer depends on your skill level and target species.
5-Tine Spears offer precision and minimal drag. They’re perfect for:
- Experienced spearers with excellent aim
- Targeting smaller species like perch (where legal)
- Situations requiring quick spear deployment
- Budget-conscious beginners practicing technique
7-Tine Spears represent the goldilocks option. They provide:
- Balanced coverage and accuracy
- Suitable for pike, muskie, and carp
- Forgiving enough for developing skills
- Professional-grade performance
9+ Tine Spears maximize coverage but add weight. Consider these when:
- Targeting very large fish (30+ pound pike/muskie)
- Fishing in poor visibility conditions
- You’re still developing accuracy
- Regulations allow harvest of multiple species
Personally, I own three spears: a 5-tine for practice and shallow water, a 7-tine workhorse for 90% of situations, and a weighted 7-tine for trophy hunting in deep water. This three-spear setup covers every scenario I encounter.
Material and Durability Factors
Carbon Steel vs. Stainless Steel – This choice significantly impacts long-term ownership:
Carbon steel spears cost less and hold edges better when sharpened. However, they require diligent maintenance to prevent rust. Apply a light oil coating after each use, especially if you fish in saltwater or brackish conditions. The powder-coated carbon steel spears (like the AA Manufacturing model) offer decent corrosion resistance without the stainless premium.
Stainless steel eliminates rust concerns entirely but costs more upfront. B’n’M’s stainless spears exemplify this approach—you’ll pay extra now but save on maintenance for decades. For anglers who fish infrequently or struggle with equipment maintenance, stainless steel proves worth the investment.
Barb Construction Methods matter for longevity:
Forged barbs (shaped during manufacturing) rarely fail. They’re part of the tine itself, not attached afterward. High-end custom spears and traditional craftsmen like JJV use this method. These spears become family heirlooms.
Welded barbs work well when properly executed. Inspect weld quality carefully—clean, smooth welds indicate good craftsmanship. Rough, incomplete welds suggest corners were cut.
Cut barbs represent the budget approach. They’ll work for casual use but may break when hitting rocks or during aggressive fish fights. If you buy a cut-barb spear, consider it a learning tool rather than a long-term investment.
Handle Design and Ergonomics
Comfort matters when you’re holding a spear for hours waiting for that perfect shot. Handle characteristics worth considering:
Length: Most handles run 12-18 inches. Longer handles improve leverage and two-handed control. Shorter handles work better in cramped darkhouses or when fishing with kids.
Material: Ash and oak provide excellent grip and traditional feel. They absorb moisture from your hands, preventing slippage even when wet. Synthetic handles stay cleaner but can feel slippery in cold conditions.
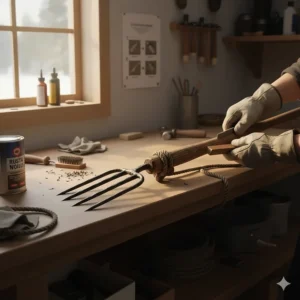
Finish: Unfinished wood lets you customize grip texture with sandpaper, checkering, or wood burning. Pre-finished handles look polished but may require grip tape in certain conditions.
Rope Attachment: Quality spears include a drilled hole at the handle’s end for rope attachment. This safety feature prevents losing your spear if you miss the fish or it’s pulled from your hands. Always use the rope—trust me on this. I once watched a $300 custom spear sink to the bottom of a 30-foot lake because someone thought they didn’t need it.
Budget Considerations and Value Analysis
Ice fishing spears span an enormous price range from $10 to $500+. Here’s how to maximize value:
Under $25 (Budget Tier): Expect cut barbs, lighter construction, and minimal accessories. Perfect for trying the sport or teaching kids. Eagle Claw and South Bend dominate this category. Don’t expect decades of service, but they’ll work for learning.
$25-$100 (Mid-Range): This sweet spot offers solid performance without breaking the bank. AA Manufacturing, Pike Slayer, and similar brands deliver welded barbs, decent balance, and included accessories. Most recreational spearers never need to spend more.
$100-$300 (Premium): Here you’ll find weighted designs, superior materials, and better craftsmanship. Grapentin spears and entry-level custom options occupy this tier. Buy here if you’re serious about the sport or targeting trophy fish regularly.
$300+ (Custom/Heirloom): Custom makers like 406, Poseidon Spears, and JJV create works of art at these prices. Hand-forged construction, complete customization, and multi-generational durability justify the investment for dedicated enthusiasts. These spears appreciate in value and get passed down through families.
My recommendation? Start with a $50-80 spear to learn the sport. After your first season, you’ll know whether to upgrade and which features matter most to your style. Don’t make my mistake of buying a $250 custom spear before understanding what you actually needed.
Ice Fishing Spear Techniques for Maximum Success
Proper Throwing Form and Mechanics
After watching countless beginners (and making every mistake myself), I’ve identified the key elements of effective spearing technique. Mastering these fundamentals dramatically improves your success rate.
The Setup Position 🎯
Before a fish even appears, position yourself correctly. Lie or kneel comfortably beside the hole—you’ll be holding this position for extended periods. Your dominant hand grips the spear about 12-18 inches from the back end, while your support hand rests near the balance point. This two-handed grip provides maximum control and power.
Keep the spear IN the water at all times, typically 6-12 inches below the surface. Breaking the water’s surface creates disturbance that spooks fish. Submerging the spear also eliminates refraction issues—water bends light, making fish appear closer and in slightly different positions than reality. By keeping your spear underwater, you’re already accounting for this optical illusion.
The Strike Sequence ⚡
When a fish enters your strike zone (typically 3-6 feet below the hole), assess its size, species, and orientation. Contrary to instinct, you DON’T want to throw when the fish faces you. Instead, wait until it turns away or presents a broadside profile. Here’s why: fish react to movement instantaneously. When they’re facing away, they can’t see the spear descending and don’t have time to bolt.
Aim for the back of the head or the upper body behind the gills. This target zone offers maximum holding capacity and quick, humane kills. Avoid tail shots—they’re dramatically less effective, and fish often twist free.
Execute the throw with controlled force, not maximum power. You’re dropping/pushing the spear rather than hurling it. The spear’s weight does most of the work. Release both hands simultaneously in a smooth, downward motion. Jerky movements reduce accuracy significantly.
Follow-Through and Retrieval 🪝
After releasing, don’t immediately pull back. Let the spear penetrate fully for 1-2 seconds, allowing barbs to engage. Then pull straight up with steady pressure—no jerking motions. Violent yanking can bend tines or cause the fish to twist free.
If you miss, reset calmly. The fish often returns, especially if you keep the decoy moving naturally. I’ve speared pike that came back three times after initial misses. Patience wins darkhouse spearing games.
Reading Fish Behavior and Strike Timing
Understanding fish behavior separates occasional success from consistent harvests. Here’s what years of observation have taught me:
Curiosity Approach: Pike and muskie typically circle the decoy 2-3 times before committing. During initial passes, they’re assessing threat levels and food potential. Don’t strike during these reconnaissance circles—you’ll miss and permanently spook the fish. Wait for the “commitment approach,” where the fish moves deliberately toward the decoy with mouth opening.
Aggressive Strike: Occasionally (usually during peak feeding times or in heavily pressured waters), fish attack without circling. These shots require quick reactions but higher success rates since the fish isn’t focused on surroundings.
Neutral Fish: Sometimes fish enter your hole but show minimal interest in the decoy. They might hover 15 feet down, barely moving. These fish can often be activated with aggressive decoy movements—quick jigging or circular patterns that trigger predatory instincts.
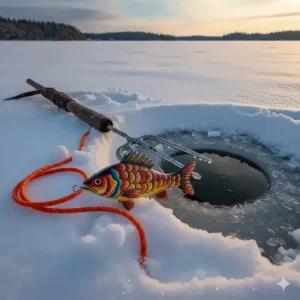
Decoy Selection and Presentation
Your decoy is equally important as your spear—it’s the lure that brings fish into range. I carry 6-8 different decoys and rotate based on conditions.
Size Matters: Match decoy size to target fish. For 20-30 inch pike, use 6-8 inch decoys. Trophy hunting (40+ inch fish) demands 10-12 inch decoys that suggest a substantial meal worth the energy expenditure.
Color Psychology: Traditional red and white decoys produce consistently, but don’t ignore alternatives:
- Bright colors (chartreuse, hot pink) excel in stained or deep water
- Natural sucker patterns work great in clear, pressured waters
- Contrasting colors (black/white, blue/orange) trigger strikes in moderate visibility
Movement Patterns: Here’s where art meets science. Start with subtle movements—gentle jigging every 20-30 seconds. If fish appear uninterested, try circular patterns (most decoys curve naturally when retrieved). Experiment with:
- Slow steady retrieves
- Fast darting movements followed by pauses
- Vertical jigging in 6-inch strokes
- Complete stillness (sometimes the most effective)
Change strategies every 15-20 minutes until you discover what works that day. Water temperature, barometric pressure, and time of day all influence fish response, so yesterday’s successful pattern might fail today.
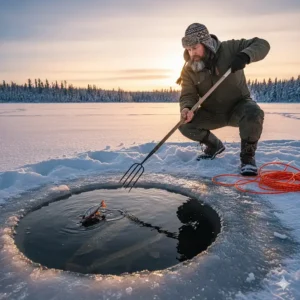
Darkhouse Setup and Positioning
Your darkhouse environment dramatically affects success rates. Here’s how to optimize it:
Light Control: Absolute darkness inside your shelter is non-negotiable. Even small light leaks spook fish or cast shadows they detect. Use weatherstripping around doors, cover any cracks, and avoid using your phone screen (seriously, that glow travels through water). The darker your house, the brighter and more visible the underwater world becomes.
Hole Size and Preparation: Most regulations require 2-3 feet by 2-3 feet minimum. Bigger is better within reason—more viewing area means better fish observation and wider throw angles. However, massive holes cool your shelter faster and require more ice removal effort.
Clear all slush and debris from the hole edges. Ice chips floating on the surface obscure your view and signal danger to approaching fish. Some anglers sprinkle aquarium gravel or crushed eggshells on the bottom to improve contrast—check local regulations first, as some states prohibit this practice.
Strategic Location Selection: Target weed edges, drop-offs, and areas near deep water. Pike and muskie patrol these zones hunting baitfish. Sandy or light-colored bottoms provide better visibility than dark muck. Depth sweet spots typically fall between 6-15 feet—shallow enough for good light penetration but deep enough for active fish.
Move if you’re not seeing fish within 2-3 hours. Portable darkhouses let you explore multiple spots per day, dramatically increasing your odds. I typically scout 3-4 locations in a single outing, spending 2-3 hours at each before moving.
Advanced Techniques and Pro Tips
Multi-Decoy Deployment: Run two decoys at different depths—one near bottom, one mid-depth. This covers more water column and can trigger competitive responses from multiple fish.
The Patience Game: Top spearers I know average 6-8 hour sessions. Short 2-hour trips rarely succeed. Bring comfortable seating, snacks, and entertainment (just not phone screens). The best spearing happens when you’re relaxed and can wait indefinitely for the right fish.
Temperature Timing: Early morning (first light) and late afternoon (last light) produce peak activity. However, midday spearing in 10+ feet of water can be excellent since fish remain active while shallow anglers struggle.
Seasonal Adjustments: Early ice (December) finds aggressive fish in shallow water. Mid-winter (January-February) pushes fish deeper and slows their metabolism—longer waits between appearances. Late ice (March) brings fish back shallow as they prepare for spawning.
Ice Fishing Spear Safety and Regulations
Understanding Legal Requirements
Before you drill that first hole, you absolutely must understand your state’s spearfishing regulations. They vary dramatically and violations carry serious penalties. Here’s what to research:
Licensing Requirements: Most states require standard fishing licenses PLUS a separate spearing license or darkhouse permit. Some states offer combination packages. Minnesota, for example, charges residents around $15-25 for a spearing license beyond their base angling license. Non-residents typically pay double or triple.
Species Restrictions: This is huge. In Minnesota, you can legally spear northern pike, muskellunge, and several rough fish species like carp, buffalo, and suckers. However, walleye, bass, panfish, and trout are completely off-limits for spearing. Other states permit different species—Vermont allows lake sturgeon spearing during specific seasons, while Wisconsin has unique regulations for each water body.
Always carry a current regulations booklet and review species identification guides. Spearing the wrong fish—even accidentally—can result in substantial fines, equipment confiscation, and license suspension. I know anglers who’ve paid $500+ penalties for spearing a single prohibited species.
Size and Bag Limits: Just like conventional angling, spearfishing has harvest limits. Minnesota allows one pike or muskie per day via spearing, with minimum size requirements (northern pike: 24-26 inches depending on water body; muskellunge: 54 inches on most waters). Some states implement slot limits—you can only keep fish below or above certain sizes to protect breeding populations.
Rough fish typically have no limits, making them excellent practice targets. Carp, in particular, offer abundant spearing opportunities and excellent table fare when prepared properly.
Seasonal Windows: Most northern states restrict spearfishing to winter months when ice is present. However, spring spearfishing during spawning runs is legal in certain areas for specific species (like suckers). Check seasonal opening and closing dates carefully—they’re rigorously enforced.
Marking Requirements: Many states require darkhouses to display registration numbers or permits visibly. If you move your darkhouse, you must mark any holes left behind to warn other ice users of the hazard. Failing to mark holes has led to tragic accidents and results in serious legal consequences.
Ice Safety Fundamentals
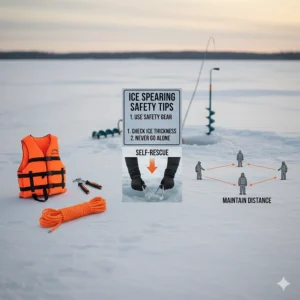
Darkhouse spearing involves unique ice safety challenges since you’re cutting massive holes that compromise ice integrity. Never take ice safety casually—several spearers die each year from ice-related accidents.
Minimum Ice Thickness Standards:
- 4 inches: Adequate for foot travel
- 5-6 inches: Snowmobile traffic
- 8-12 inches: Small vehicles (ATVs)
- 12-15 inches: Medium vehicles
However, these are minimums for CLEAR, SOLID ice. Cloudy ice, snow ice, or ice with visible cracks requires 50-100% more thickness. Early season and late season ice demands extra caution as conditions change rapidly.
Testing Ice Safely: Never assume ice thickness based on visual inspection alone. Use an ice chisel or cordless drill with a long auger bit to test as you travel. Drill test holes every 50-100 feet when exploring new areas. If your chisel breaks through with one strike, turn back immediately—the ice is too thin.
Carry ice picks or awls on a neck lanyard. If you break through, these tools let you pull yourself out by stabbing into solid ice for grip. Practice this technique in controlled conditions so muscle memory kicks in during emergencies.
Safety Equipment Checklist: ✅
Every spearing trip should include:
- Ice picks/awls (neck lanyard, not pocket)
- 50-foot throw rope
- Personal flotation device (PFD) or float suit
- Ice cleats (slip-on traction)
- Whistle for signaling
- Fully charged cell phone in waterproof case
- Backup warmth (emergency blanket, dry clothes in vehicle)
- First aid kit
Spear Handling Safety: 🔪
Ice fishing spears are incredibly dangerous weapons. Those barbed tines will penetrate anything—including you. Follow these non-negotiable safety rules:
- Always use spear guards when not actively fishing. Most quality spears include metal or plastic covers that protect the tines.
- Attach a safety rope between your spear and a fixed object inside the darkhouse. This prevents losing the spear if you miss a throw, but more importantly, it keeps the spear from sliding into deep water where someone might step on it later.
- Never horseplay with spears. I’ve witnessed “accidental” stabs that required emergency room visits. Treat spears with the same respect as firearms.
- Store spears vertically or flat when transporting. Carrying them at waist level in crowded spaces creates collision hazards.
- Be mindful of rope tangles. The retrieval rope can catch on boots, equipment, or your body. Before each throw, verify the rope is clear and properly coiled.
Darkhouse-Specific Hazards:
The combination of darkness, large open holes, and weapon handling creates unique risks:
- Keep the floor clear of equipment, ropes, and debris. Tripping while holding a spear can result in serious injury.
- Install a barrier around the hole—even a simple rope or board prevents accidental falls.
- Never drink alcohol while spearing. Reaction time, balance, and judgment all suffer, increasing accident risks dramatically.
- Keep children supervised at all times. That big opening looks inviting to curious kids, and drowning can occur in seconds.
Environmental Responsibilities
As stewards of our fisheries, responsible spearers follow ethical practices that ensure healthy ecosystems and positive public perception:
Selective Harvest: One advantage of spearing is the ability to be extremely selective. Unlike conventional fishing where you can’t see what you’re catching, spearing lets you assess each fish’s size, health, and species before striking. I pass on 90% of fish that enter my hole, waiting for that perfect harvest.
Only take fish you’ll eat. Trophy mounting is fine, but harvesting large fish just for photos harms breeding populations. Those 40+ inch pike are prime spawners—consider catch and release (though challenging with spears) or targeting smaller, more abundant fish.
Proper Fish Handling: If you spear a prohibited species accidentally (it happens), attempt to release it carefully if possible. Remove the spear gently, support the fish until it recovers, and release it promptly. Some states require reporting accidental harvest—check your regulations.
Darkhouse Etiquette:
- Clean up all trash and equipment before leaving
- Fill in any holes you excavate (local regulations often require this)
- Report any environmental concerns (pollution, fish kills) to authorities
- Share information with other spearers to build community knowledge
Conservation Mindset: Modern spearfishing is rooted in harvest, but conservation ensures future generations enjoy the same opportunities. Support habitat restoration projects, fishery management programs, and organizations working to maintain healthy fish populations.
According to the U.S. Fish and Wildlife Service, ice fishing contributes significantly to local economies while providing critical population management for certain species. Responsible spearing fits within this framework when done ethically and legally.
Essential Ice Fishing Spear Accessories and Gear
Must-Have Supporting Equipment
A quality ice fishing spear is only part of your complete darkhouse spearing setup. These accessories transform a frustrating outing into a successful, comfortable experience:
Ice Saws and Cutting Tools 🪚
You can’t spear fish without a large hole, and creating one requires serious cutting tools. Standard ice augers cut holes far too small for spearing—you need openings of 2-3 feet in each direction.
Ice saws (also called crosscut saws) are purpose-built for this task. They feature aggressive tooth patterns designed to cut through 12-24 inches of ice efficiently. Quality models run $50-100. The technique involves drilling auger holes at each corner of your planned opening, then connecting them with the saw. It’s hard work, but it’s also your winter workout!
Ice chisels or spud bars help chip away edges and clean up your hole’s perimeter. They’re also essential safety tools for testing ice thickness as you travel. Budget $30-50 for a quality chisel.
Darkhouse Shelter Options 🏚️
Your shelter makes or breaks the spearing experience. You have several options:
Permanent darkhouses are wooden structures left on the ice all winter (where regulations allow). They offer maximum comfort with insulation, benches, and ample space. However, they’re expensive ($500-3000+), require transportation equipment, and need storage during off-season. Traditional hardwood construction makes them heavy—often requiring snowmobiles or ATVs to move.
Portable flip-over darkhouses provide a compromise. These converted flip-over ice shelters feature blackout curtains and modified floors with removable panels over the spearing hole. Companies like Ambush (Stryker Darkhouse) and Eskimo make specialized models. Expect to pay $800-2000, but you get portability and rapid setup.
DIY darkhouses can be built from tarps, PVC frames, and blackout fabric for under $200. While not as comfortable, they work perfectly fine and allow unlimited customization. Many experienced spearers start here before upgrading.
The critical requirements for any darkhouse:
- Complete blackout (absolutely no light leaks)
- Adequate floor space (6′ x 6′ minimum for comfortable movement)
- Sufficient height to stand/maneuver
- Proper ventilation (prevent carbon monoxide buildup if using heaters)
- Portability appropriate to your fishing style
Decoy Systems and Storage 🎣
Your decoy collection grows quickly as you discover what works in different conditions. Proper storage and deployment systems keep everything organized:
Decoy boxes protect hand-carved and expensive decoys during transport. Foam-lined cases prevent damage from bouncing around in truck beds or sleds.
Decoy rigging includes adjustable lines, swivels, and weight systems. Most spearers use 30-40 feet of braided line attached to an overhead pulley system or simple rod holder. This lets you raise and lower the decoy easily while keeping it moving naturally.
Popular decoy brands include Bear Creek, Lakco, and various custom carvers. Expect to pay $15-30 for mass-produced plastic models up to $100+ for hand-carved wooden decoys. I recommend starting with 3-4 different decoys:
- Traditional red/white sucker pattern
- Natural sucker coloration
- Bright attractor (chartreuse or hot pink)
- Large pike pattern for trophy hunting
Ice Tongs and Fish Handling Tools 🐟
Once you successfully spear a fish, you need to extract it from the hole—which can be surprisingly challenging with large pike or muskie. Ice tongs provide a secure grip on slippery fish and prevent them from sliding back down the hole.
Quality ice tongs cost $30-60 but last forever. The Nils Master and Lakco brands are excellent. Look for models with aggressive teeth and comfortable handles that work with gloves.
A sturdy gaff also helps, particularly for trophy fish that might weigh 20+ pounds. The combination of gaff and tongs gives you maximum control.
Measuring Boards and Documentation 📏
Since you can assess fish before harvesting, having a measuring board ensures you’re legal. Mount it inside your darkhouse where it’s visible through the hole—you can measure fish BEFORE spearing to verify they meet size requirements.
For memorable catches, a waterproof camera and basic fish gripper let you document your success. Many states require proof of length for trophy citations, so having documentation equipment ready is smart.
Cold Weather Clothing and Comfort Gear
Darkhouse spearing involves sitting relatively still for hours in freezing conditions. Proper clothing makes the difference between miserable endurance and comfortable enjoyment:
Layering System:
Base layer (against skin): Merino wool or synthetic moisture-wicking fabric. Avoid cotton—it holds moisture and chills you quickly.
Mid layer (insulation): Fleece or down provides warmth without bulk. Multiple lighter layers beat one heavy layer.
Outer layer (weather protection): Windproof/waterproof shell or insulated bibs. Ice fishing-specific suits from Clam, Eskimo, or Striker include features like reinforced knees, waterproof seats, and ample pockets.
Don’t skimp on accessories: Quality insulated boots (rated to -40°F), wool socks, insulated gloves (with spare pairs), and warm hats prevent frostbite. I also carry chemical hand warmers and battery-powered heated insoles for extreme cold days.
Comfort Additions: 🛋️
- Padded seat or bucket seat cover
- Insulated kneeling pad (for lying position)
- Small portable heater (propane or electric—ensure proper ventilation)
- Thermos with hot beverages
- High-calorie snacks (your body burns massive calories fighting cold)
Lighting Systems: 💡
While your darkhouse stays black inside, you need light for tasks like baiting hooks (if combining techniques), checking phones/watches, or exiting safely. Red headlamps preserve night vision better than white lights. Install a small red LED near the entrance for moving around safely without compromising the darkness around your hole.
Technology and Modern Enhancements
Today’s spearers can leverage technology that our predecessors never imagined:
Underwater Cameras: Companies like Aqua-Vu and MarCum offer cameras you can lower down nearby holes to scout fish activity without disturbing your spearing hole. This reconnaissance dramatically improves location selection. Expect to invest $150-500 for quality systems.
Sonar/Fish Finders: Portable ice fishing sonar shows depth contours, fish presence, and decoy depth. While not necessary for traditional darkhouse spearing (you can see fish visually), sonar helps locate productive areas before cutting your hole. Flasher-style units start around $200.
GPS and Mapping: Modern GPS units or smartphone apps with lake maps help you relocate productive spots season after season. Mark waypoints where you’ve seen fish, noted weed edges, or found ideal structure. Over time, you build a personal database of hotspots.
Communication Devices: When fishing with groups, two-way radios let you share information about fish activity across multiple darkhouses. This community approach significantly improves everyone’s success rate.
Comparing Ice Fishing Spear with Traditional Ice Fishing Methods
Advantages of Spear Fishing Through Ice
After thousands of hours doing both traditional jigging and darkhouse spearing, I can objectively assess the strengths of each method. Here’s why spearing deserves a place in every ice angler’s arsenal:
Visual Confirmation 👁️
The single biggest advantage—you see EVERYTHING. Unlike blind jigging where you’re guessing what’s below, spearing provides a real-time underwater view. You observe:
- Exact fish species, size, and condition before committing
- How fish interact with your presentation
- Bottom structure, vegetation, and baitfish activity
- Water clarity and underwater landscape
This visual feedback accelerates your learning curve dramatically. In one session, you’ll gain more understanding of fish behavior than dozens of traditional ice fishing trips.
Selective Harvest 🎯
Spearing lets you be incredibly choosy. That 25-inch pike? Pass. That 35-inch trophy? It’s decision time. Traditional methods catch whatever bites—you can’t select for size until the fish is already hooked. This selectivity protects breeding populations while allowing targeted harvest of specific fish.
The Hunting Experience 🏹
Spearing feels more like hunting than fishing. The anticipation, the stalking behavior, the precise moment of truth—it engages different instincts than passive jigging. Many anglers who’ve grown bored with traditional fishing rediscover excitement through darkhouse spearing.
As detailed in outdoor education research, harvest-based activities create deeper connections to conservation and sustainable resource use. Spearing embodies this hands-on relationship with fish populations.
Unique Fish Behavior Observations 🐠
The educational value is enormous. You’ll witness:
- Pike stalking patterns (they’re surprisingly methodical)
- Fish reacting to temperature layers
- Predator-prey interactions
- How fish respond to different stimuli
I’ve watched pike investigate my decoy, circle it multiple times, then suddenly strike a real minnow school passing by. These observations inform all my fishing strategies, even when using conventional tackle.
When Traditional Ice Fishing Works Better
Despite my passion for spearing, traditional ice fishing excels in many situations:
Versatility Across Species 🎣
Conventional ice fishing targets virtually any species—walleye, perch, crappie, bluegill, trout, whitefish, burbot, and more. Most states heavily restrict spearing to pike, muskie, and rough fish. If you want to catch walleye, you’re jigging or tip-up fishing, not spearing.
Lower Barrier to Entry 💰
Starting costs for traditional ice fishing:
- Basic ice fishing rod combo: $30-50
- Small tackle selection: $20-30
- Ice auger (manual): $40-80
- Total: $100-200
Darkhouse spearing startup costs:
- Quality spear: $50-150
- Ice saw: $50-100
- Darkhouse (basic): $200-2000
- Decoys: $30-100
- Total: $350-2500+
For anglers testing the waters (pun intended), conventional ice fishing offers a much more accessible entry point.
Mobility and Efficiency ⚡
Traditional anglers drill a 6-8 inch hole in seconds and start fishing immediately. Moving locations takes 2-3 minutes. Darkhouse spearers need 30-60 minutes to cut holes, set up shelters, and get everything positioned. If fish aren’t present, you’ve invested significant time before discovering the location won’t produce.
Active jigging anglers can run 4-6 holes simultaneously using tip-ups and portable electronics, covering more water and finding active fish faster. Spearing commits you to one location for extended periods.
Social Aspects 👥
Traditional ice fishing accommodates groups easily—everyone can fish close together, share holes, and maintain conversation. Darkhouses must remain completely dark and quiet, limiting social interaction. Many anglers fish for the camaraderie as much as the catching, making group jigging more appealing.
Catch-and-Release Ethics ♻️
Modern fishing emphasizes conservation through catch-and-release practices. With conventional tackle, carefully handled fish survive at 90%+ rates. Spearing is inherently harvest-oriented—successfully speared fish rarely survive release due to penetrating trauma.
For anglers prioritizing conservation over consumption, traditional methods align better with their values. However, responsible spearing—taking only fish you’ll eat and passing on everything else—can be equally conservation-minded.
Combining Both Approaches
Many successful ice anglers, myself included, practice both methods depending on conditions, target species, and objectives:
Use darkhouse spearing when:
- Targeting pike or muskie specifically
- You want trophy fish for eating
- Conditions favor long sits (stable weather, good ice)
- You’re after that unique hunting/stalking experience
- Rough fish populations need management
Choose traditional ice fishing when:
- Targeting walleye, perch, panfish, trout
- Weather is extreme (traditional shelters heat more effectively)
- You’re with groups or teaching beginners
- Time is limited (quick mobility matters)
- Conservation through catch-release is the goal
The hybrid approach: Set up a darkhouse for spearing while running tip-ups or jigging rods through smaller holes nearby for panfish. This maximizes your harvest opportunities while staying engaged. On slow spearing days, having backup fishing methods prevents boredom and ensures you go home with fish.
Maintaining and Caring for Your Ice Fishing Spear
Cleaning and Storage Best Practices
Proper maintenance extends your spear’s life from years to decades—or even generations in the case of premium models. Here’s my end-of-season routine that keeps spears in prime condition:
Immediate Post-Use Cleaning 🧼
After each fishing session:
- Rinse the entire spear with fresh water to remove fish slime, blood, and lake water contaminants. Use warm (not hot) water with mild dish soap for stubborn residue.
- Dry thoroughly with clean towels, paying special attention to crevices where water collects. Moisture trapped in handle joints or barb spaces causes rust and deterioration.
- Inspect all components carefully. Look for:
- Bent or damaged tines
- Loose welds or connections
- Rust spots forming
- Wooden handle cracks or rot
- Frayed retrieval rope
Address issues immediately—small problems become major failures if ignored.
Rust Prevention for Carbon Steel 🛡️
Carbon steel spears (most models) require active rust prevention:
- Apply a light coat of food-safe mineral oil or specialized rust preventative (like WD-40 or 3-IN-ONE oil) to all metal surfaces. Use a clean cloth to rub it in thoroughly.
- Avoid heavy grease applications—they collect dirt and gunk. Thin oil coats work better.
- Reapply protective coating every 30-60 days during storage, especially in humid environments.
Long-Term Storage 📦
Off-season storage (spring through fall) requires extra care:
- Vertical storage is ideal. Hang spears vertically from the handle using sturdy wall hooks. This prevents shaft warping and keeps tines safe. If vertical storage isn’t possible, lay them flat on padded surfaces—never lean them at angles, which causes slow deformation.
- Climate control matters. Store in dry environments with stable temperatures. Avoid damp basements, unheated garages with high humidity, or anywhere moisture condenses. Dehumidifiers help in problematic spaces.
- Keep spear guards on. Those protective covers aren’t just for transportation—they prevent accidental injury during storage and protect tine tips from damage.
- Rope storage: Coil retrieval ropes loosely and hang them separately or attach them with slack. Tight storage creates permanent kinks that affect performance.
Sharpening Tines and Barb Maintenance
Over time, spear tines dull from use, especially when contacting rocks, ice chunks, or thick-scaled fish. Maintaining sharp points dramatically improves penetration and quick kills.
When to Sharpen:
- Points feel rounded rather than needle-sharp
- Penetration seems reduced compared to earlier performance
- Visible damage or rolling on tine tips
- After hitting hard objects (rocks, frozen wood, etc.)
Sharpening Process: 🔪
- Secure the spear. Clamp it in a vice or have a helper hold it steady. Never try to sharpen while holding the spear in your lap—that’s asking for injury.
- Use appropriate tools:
- Metal files (mill bastard or smooth files) for major reshaping
- Fine diamond stones for finishing edges
- Leather strops for final honing
- File technique: Work from the base of the tine toward the point, maintaining the original angle (typically 15-20 degrees). Use smooth, consistent strokes. Remove equal material from all tines to maintain balance.
- Barb attention: Sharpen barbs carefully—they’re often welded and can be damaged by aggressive filing. Just touch up their holding edges rather than trying to make them razor-sharp.
- Test sharpness: Carefully test on paper or cardboard. Sharp tines should pierce easily with minimal pressure.
When Professional Service Makes Sense:
If your spear has major damage—severely bent tines, broken welds, cracked handles—consider professional restoration. Many custom spear makers offer repair services. Costs vary ($50-150 typically) but beat replacing a $200+ spear.
Dealing with Damage and Repairs
Accidents happen. Here’s how to address common issues:
Bent Tines 🔧
Small bends (less than 10-15 degrees) can often be straightened:
- Heat the affected area gently with a propane torch until it glows dull red (not bright orange—that’s too hot)
- Use pliers or a vice to slowly bend the tine back to position
- Allow to cool naturally (don’t quench in water—rapid cooling weakens metal)
- Re-sharpen the affected area
Severe bends or cracks require professional repair or replacement. Don’t risk a failed spear during that trophy shot.
Loose Handles
Wooden handles sometimes loosen at the connection point:
- Remove the handle completely if possible
- Clean both mating surfaces
- Apply marine-grade epoxy to threads or joints
- Reassemble and allow 24 hours to cure
- Some traditionalists wrap connection points with waxed fishing line for extra security
Rust Remediation
Caught rust early? It’s repairable:
- Remove loose rust with fine steel wool or brass brush
- Apply rust converter solution (converts rust to stable compounds)
- After drying, sand smooth with fine sandpaper
- Apply fresh rust preventative coating
Advanced rust requires wire wheel or sandblasting treatment, then complete refinishing. Powder-coated spears can be re-coated by professional services.
Rope and Retrieval System Maintenance
Don’t overlook the retrieval rope—it’s literally the lifeline keeping your investment from disappearing into deep water.
Rope Selection: Use strong, abrasion-resistant rope rated for at least 100 pounds breaking strength. Braided nylon or polyester work excellently. Avoid:
- Cotton ropes (rot quickly when wet)
- Cheap polypropylene (degrades in sunlight)
- Rope that’s too thin (cuts hands, prone to tangling)
Regular Inspection: Check your rope before each season:
- Look for fraying, especially near knots and attachment points
- Ensure knots remain secure and haven’t loosened
- Verify attachment hardware (swivels, snaps) functions smoothly
- Replace questionable rope—it costs $5-10 versus losing a $200 spear
Proper Attachment: Secure rope through the drilled handle hole using a figure-eight knot (strong and easy to untie). Attach the other end to a fixed point inside your darkhouse using a bowline knot. Include 6-12 inches of slack in working length—too tight restricts throwing motion.
Seasonal Preparation Checklist
Before each ice season starts, run through this comprehensive check:
✅ August-September (Pre-Season):
- Retrieve spear from storage
- Complete inspection for any off-season damage
- Sharpen tines and barbs
- Test rope integrity
- Replace protective guards if damaged
- Apply fresh rust preventative
✅ First-Ice (November-December):
- Field test in shallow water on first outings
- Verify balance and throwing accuracy
- Adjust rope length based on preferred darkhouse setup
- Stock backup supplies (extra rope, cleaning materials)
✅ Mid-Season (January-February):
- Inspect for developing issues from active use
- Clean after each trip
- Monitor for any performance changes
- Sharpen if penetration seems reduced
✅ Late-Season (March-April):
- Final cleaning before storage
- Complete rust prevention treatment
- Document any repairs needed for off-season
- Properly store with guards in place
This maintenance routine has kept my primary spear in perfect condition for 12 years and counting. My grandfather’s JJV custom spear from the 1970s still functions flawlessly because he followed similar practices. Quality spears with proper care become family heirlooms that grow in value both monetarily and sentimentally.
Frequently Asked Questions
❓ What water depth works best for ice fishing spear success?
❓ How much does a quality ice fishing spear cost in 2025?
❓ Can I legally spear fish other than pike in Minnesota?
❓ What's the difference between weighted and non-weighted spears?
❓ How do I start ice fishing spearing if I've only done traditional ice fishing?
Conclusion: Choosing Your Perfect Ice Fishing Spear
After this deep dive into darkhouse spearing, you’re equipped with everything needed to select the ideal ice fishing spear for your situation. Let’s recap the key decision points:
For beginners on a budget, the AA Manufacturing CNC Plasma Cut ($45-65) or Eagle Claw AFISH5 ($10-15) provide excellent entry points. Learn proper technique and discover if darkhouse spearing resonates with you before investing heavily.
Serious enthusiasts targeting trophy pike and muskie should consider the Grapentin Weighted Barbed ($129-149) for deep water or the Pike Slayer 7-Tine ($79.99) for all-around performance. These professional-grade spears deliver the precision and power needed for challenging conditions.
Those wanting customization and heirloom quality can’t beat the 406 Custom 7-Tine ($200-250) with its fully personalized design and American craftsmanship.
Remember: the perfect spear matches your fishing depth, target species, skill level, and budget. Start with moderate equipment, develop your skills, and upgrade as your understanding deepens. The ice fishing spear that seems perfect on paper might not suit your actual fishing style until you’ve logged time on the ice.
Darkhouse spearing connects you to centuries of angling tradition while providing some of the most exciting moments in fishing. That first successful spear throw—watching your carefully aimed shot strike true—creates an unforgettable rush that keeps spearers returning season after season.
The right equipment transforms this ancient practice from frustrating to phenomenally rewarding. Whether you’re stalking trophy northerns in Minnesota, targeting muskie in Wisconsin, or pursuing carp in New York, a quality ice fishing spear becomes an extension of your hunting instinct.
Now get out there, set up that darkhouse, lower your decoy, and experience the magic of watching fish swim into your world. The ice is calling, and your perfect spear is waiting. Tight lines and straight throws!
🎯 Start Your Darkhouse Spearing Adventure Today!
Ready to experience the thrill of ice fishing spear hunting? Click on any of the highlighted spears in this guide to check current prices and availability. Your trophy pike is waiting beneath the ice—don’t miss another season! Every product recommended here will set you up for success. 🏆❄️
Recommended for You
- Ice Fishing Sleds: 7 Best Options for 2025 (Expert Guide)
- Ice Fishing Heater: 7 Best Warmth Solutions for 2025
- Ice Fishing Chair: 7 Best Picks for Ultimate Comfort
Disclaimer: This article contains affiliate links. If you purchase products through these links, we may earn a small commission at no additional cost to you.
✨ Found this helpful? Share it with your friends! 💬🤗